Timely Tactics: November edition
Welcome to Timely Tactics, where we break down some of the nifty things you can do with Timely. I’ll wager there’s always a new trick up our sleeve to show you, no matter how long you’ve been with us!
We’ve got a few different tricks to show you this month, ranging from Calendar to Customers to Sales. So without further ado, let’s swoop right in:
- Using recurring busy times
- Edit a customer’s details – from the appointment!
- Access handy Sales reports
- View Recent activity from the Dashboard
- Adding notes to classes
- Jump ahead in the Calendar
1. Using recurring busy times
Busy time is a great way to block out any time that you’re not available to see customers. You can use this for admin time or staff meetings, or even for personal commitments and appointments. TIP: Setting busy times will help you get more accurate reports at the end of the month! If you don’t want your busy times to count towards your total Booked Percentage (your Productivity Report), then just adjust that it your report settings.
If you have regularly scheduled busy time, then you can add recurring busy time to your calendar, so you don’t have to add each one individually.
When you use the Weekly recurrence option, you can also decide which days of the week that recurrence will apply to. For example: If you have a meeting at 11am every Monday, Wednesday and Friday, you would select the Weekly recurrence option and choose when you would like it to end:
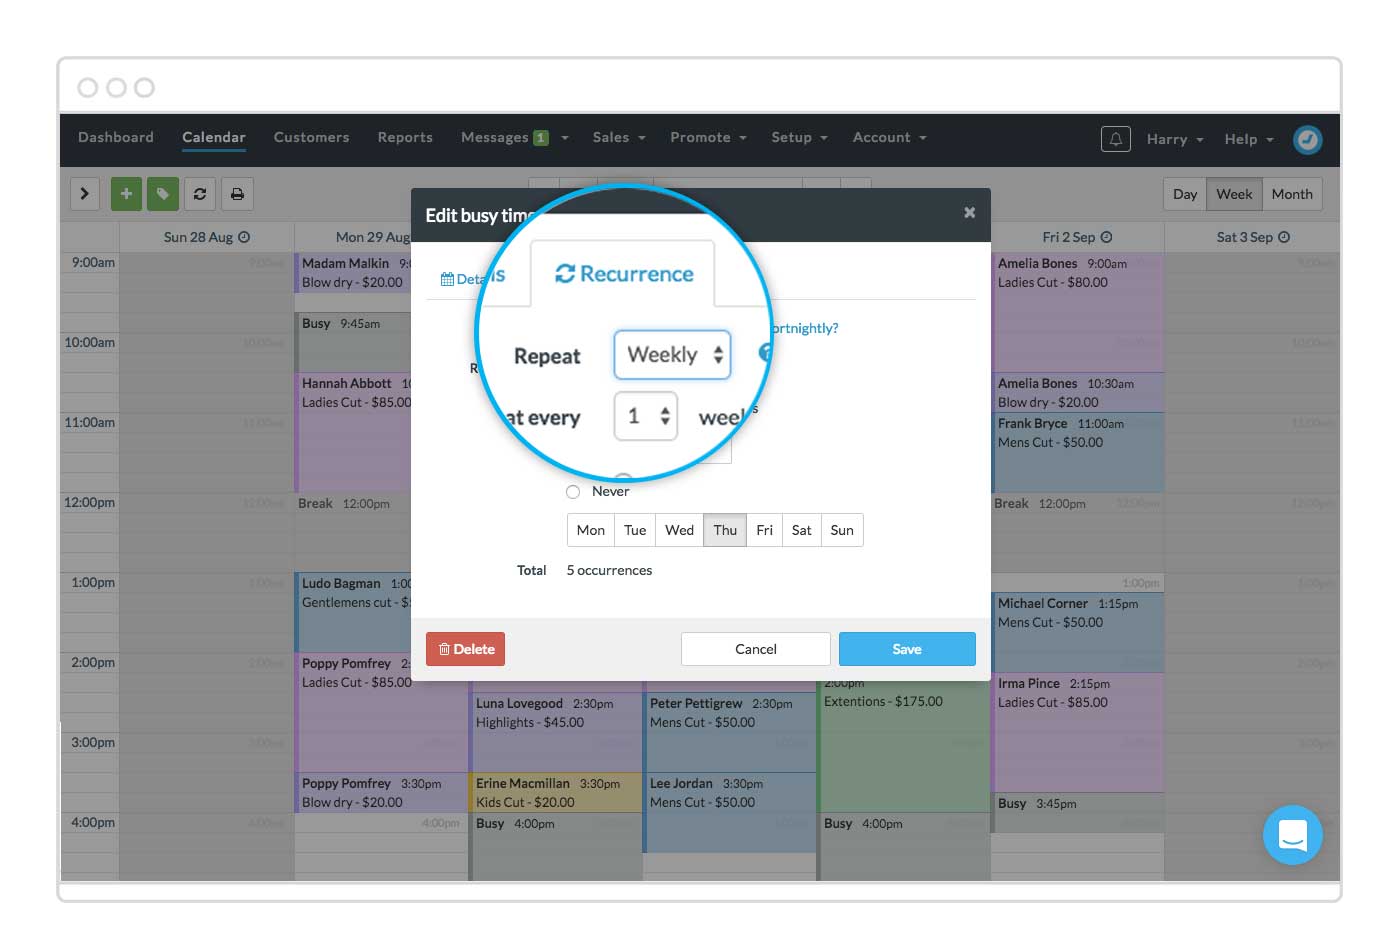
You can then select other days of the week you would like to add this busy time to, by toggling on the days along the bottom. This is perfect for scheduling busy time during the working week only, while leaving your weekend free and uncluttered.
2. Editing a customer’s details – from an appointment!
Perhaps you’re booking in a customer for an appointment and they mention that they’ve changed their email or mobile since their last visit. Or, they’ve pointed out a typo in their name (we’ve all been there) that needs fixing. Easy! You can quickly update their basic contact details, without even leaving the appointment screen. Just click the Edit customer link next to their details. Make any adjustments to their details and click Update to apply your changes: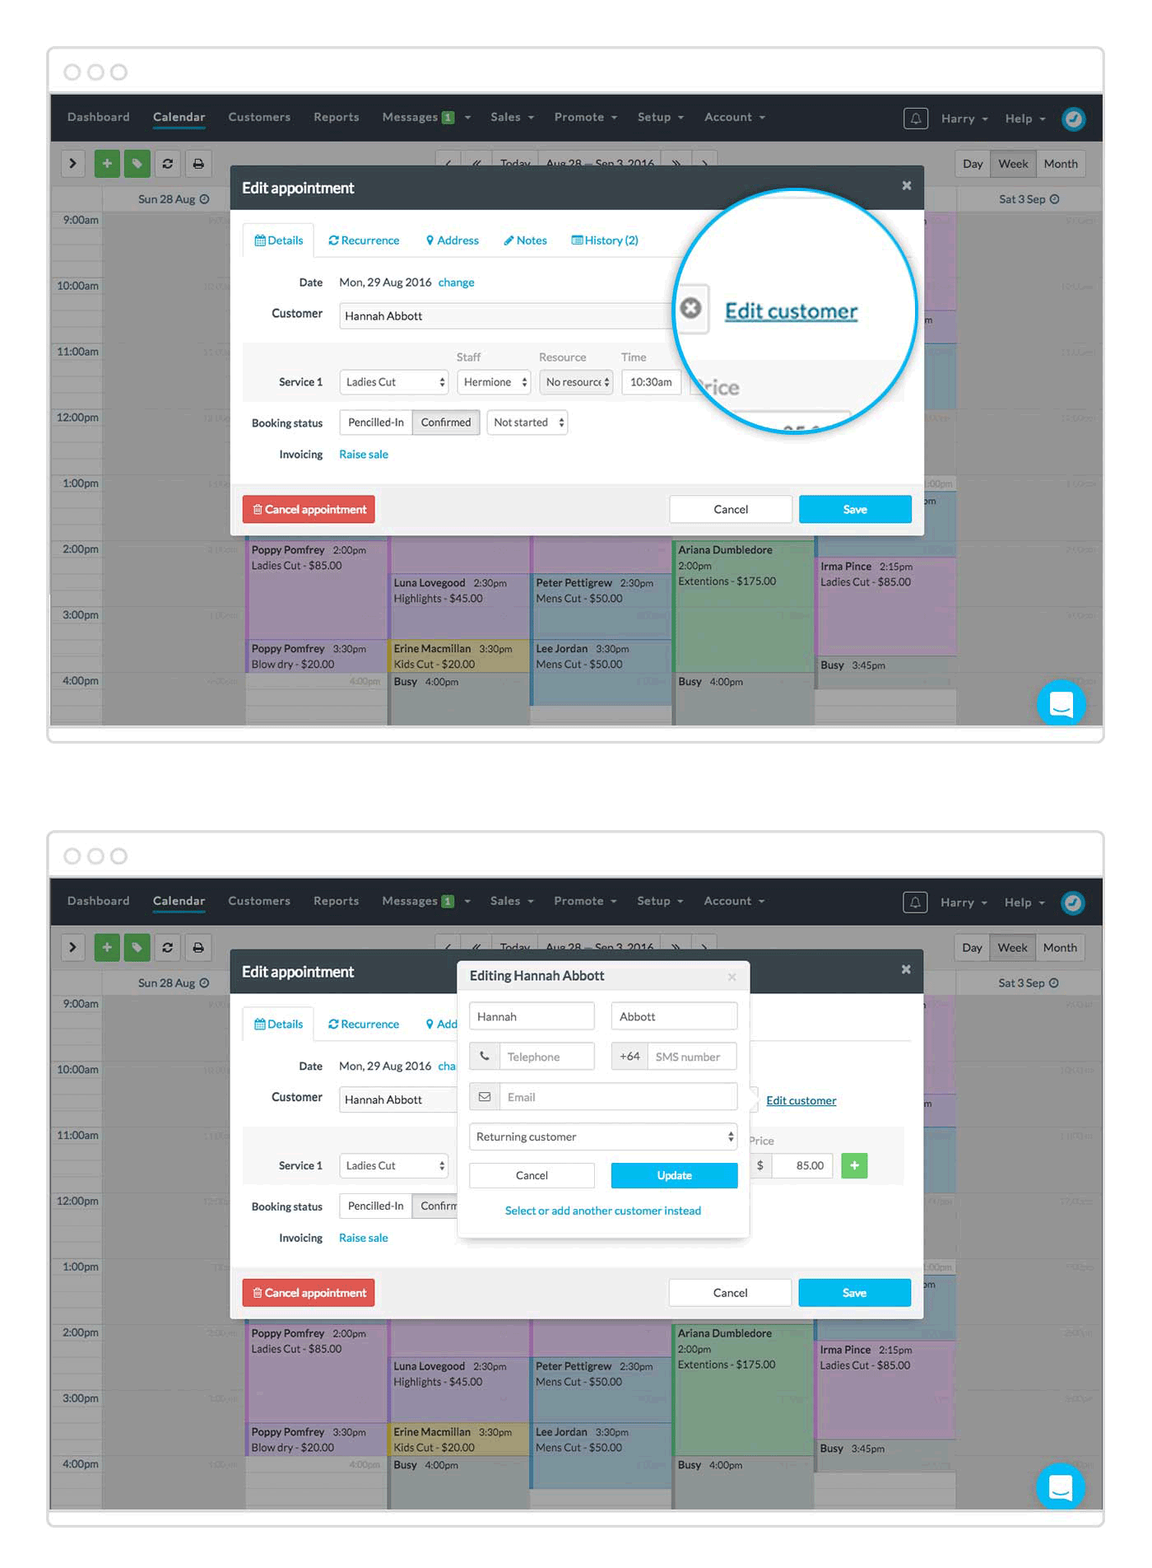
Any changes are applied to their customer record, which will mean they are automatically updated across their other bookings in the calendar. No need for you to lift a finger.
3. Access handy Sales reports when you need them
Hanging out in the Sales tab and want to take a quick look at how things are tracking? Click the Reports button in the top right corner, to quickly open the Sales report, Unpaid invoices or Transaction summary reports: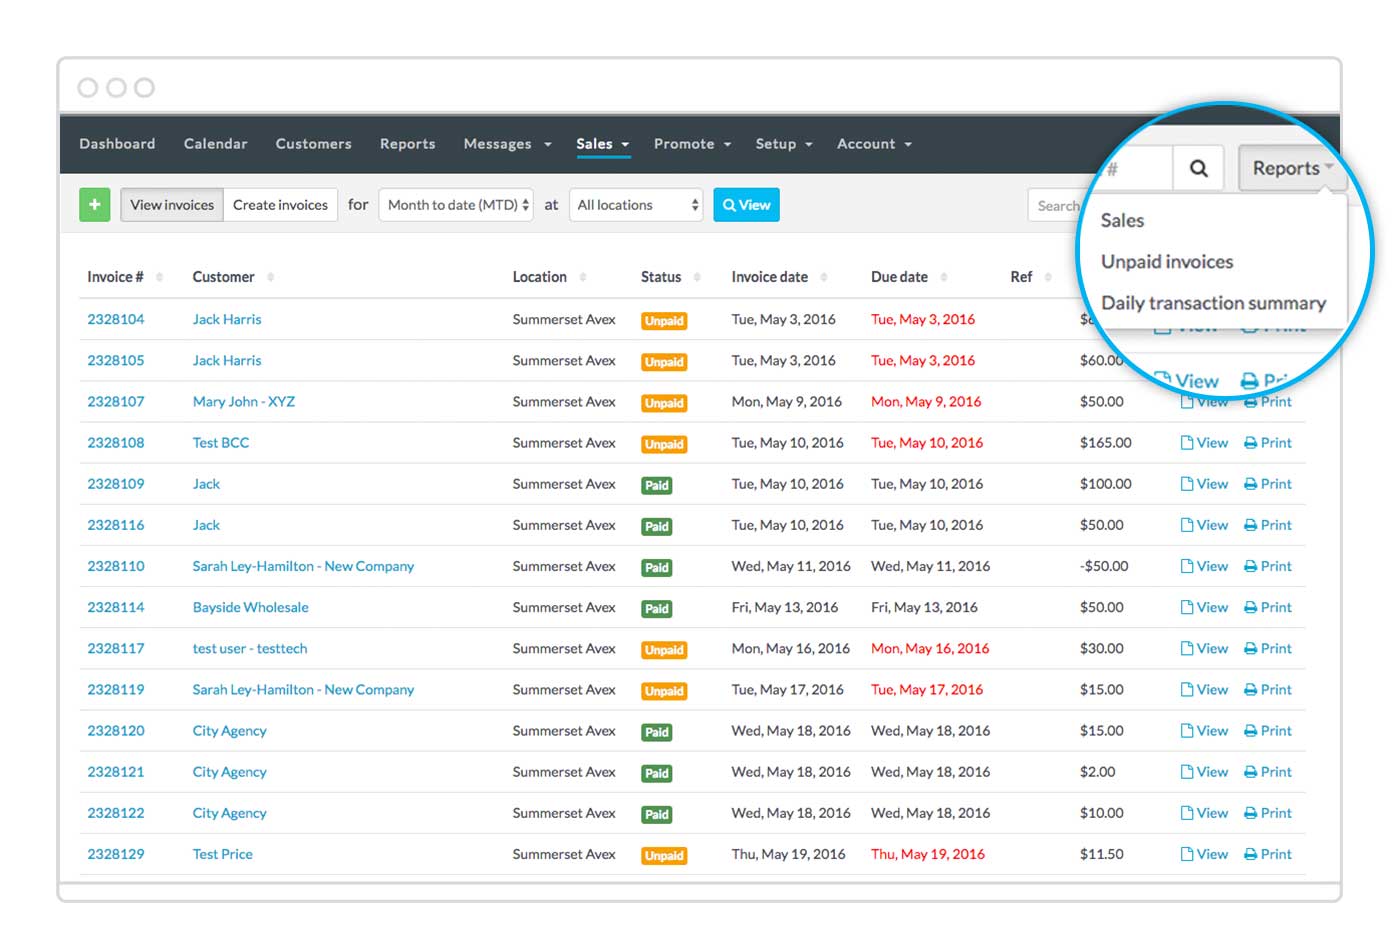
You can then choose which date range, location and/or staff member you’d like to review each report for. Note: The Unpaid invoices report can’t be filtered by date/staff member/location.
4. View Recent Activity from the Dashboard
If you’d like to keep an eye on any new appointments, or cancellations, then we’ve got you covered. Head to the Activity Dashboard and check out the right-hand column. You’ll be able to see any Recent activity on the account: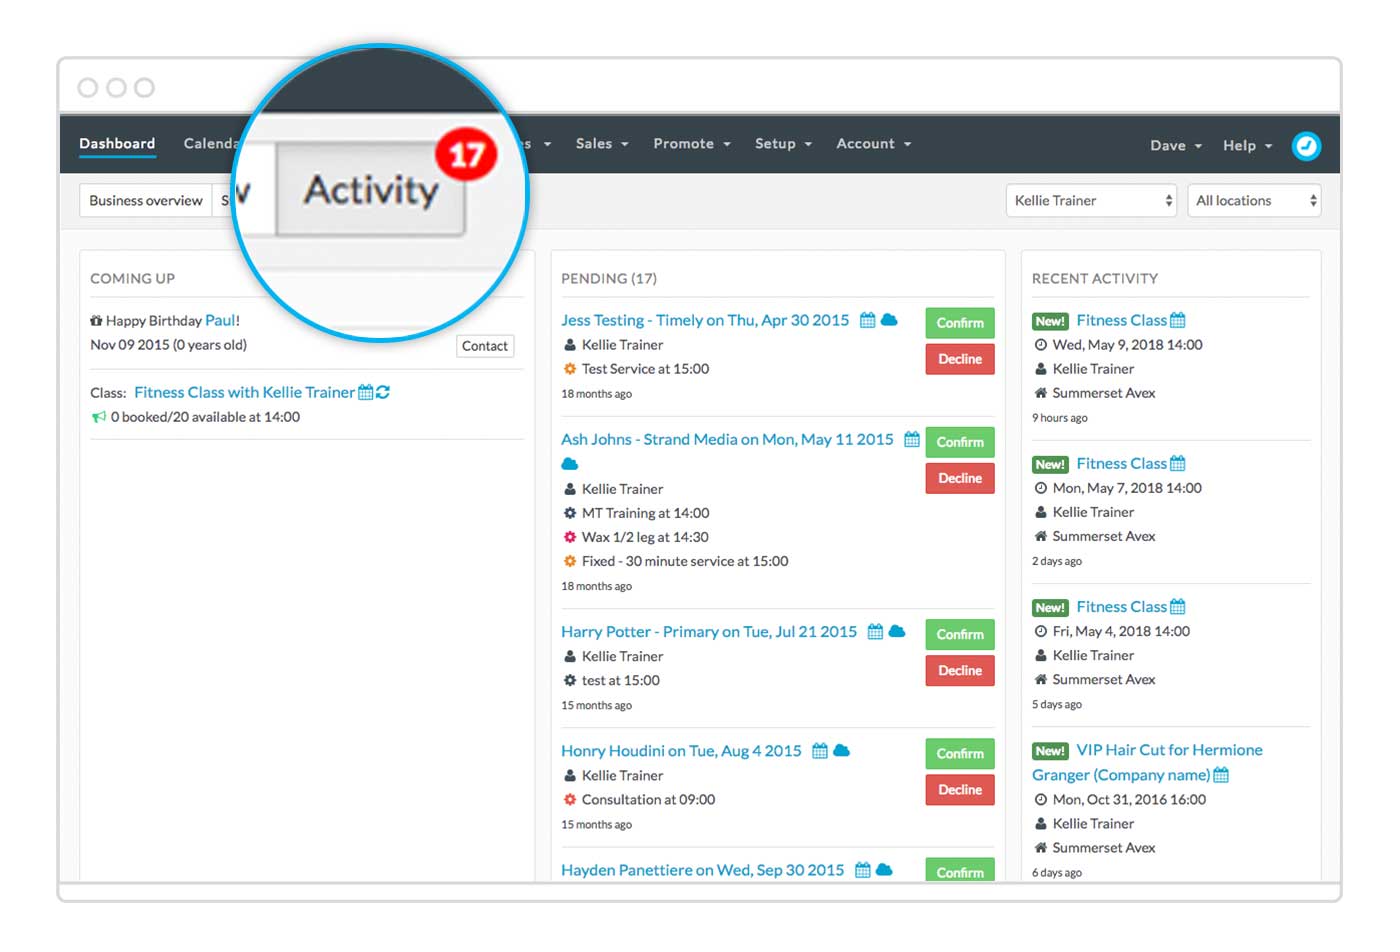
This will include both new appointments and any cancellations. You can then click to view the appointment details, or check out the appointment’s history.
5. Adding notes to classes
If you need to record some important information about a class or its attendees, then you’re going to love class notes! You can add general notes to the class, as well as an individual note for each customer. To add a note for the customer, click on their name in the list of attendees and click the Show notes link: 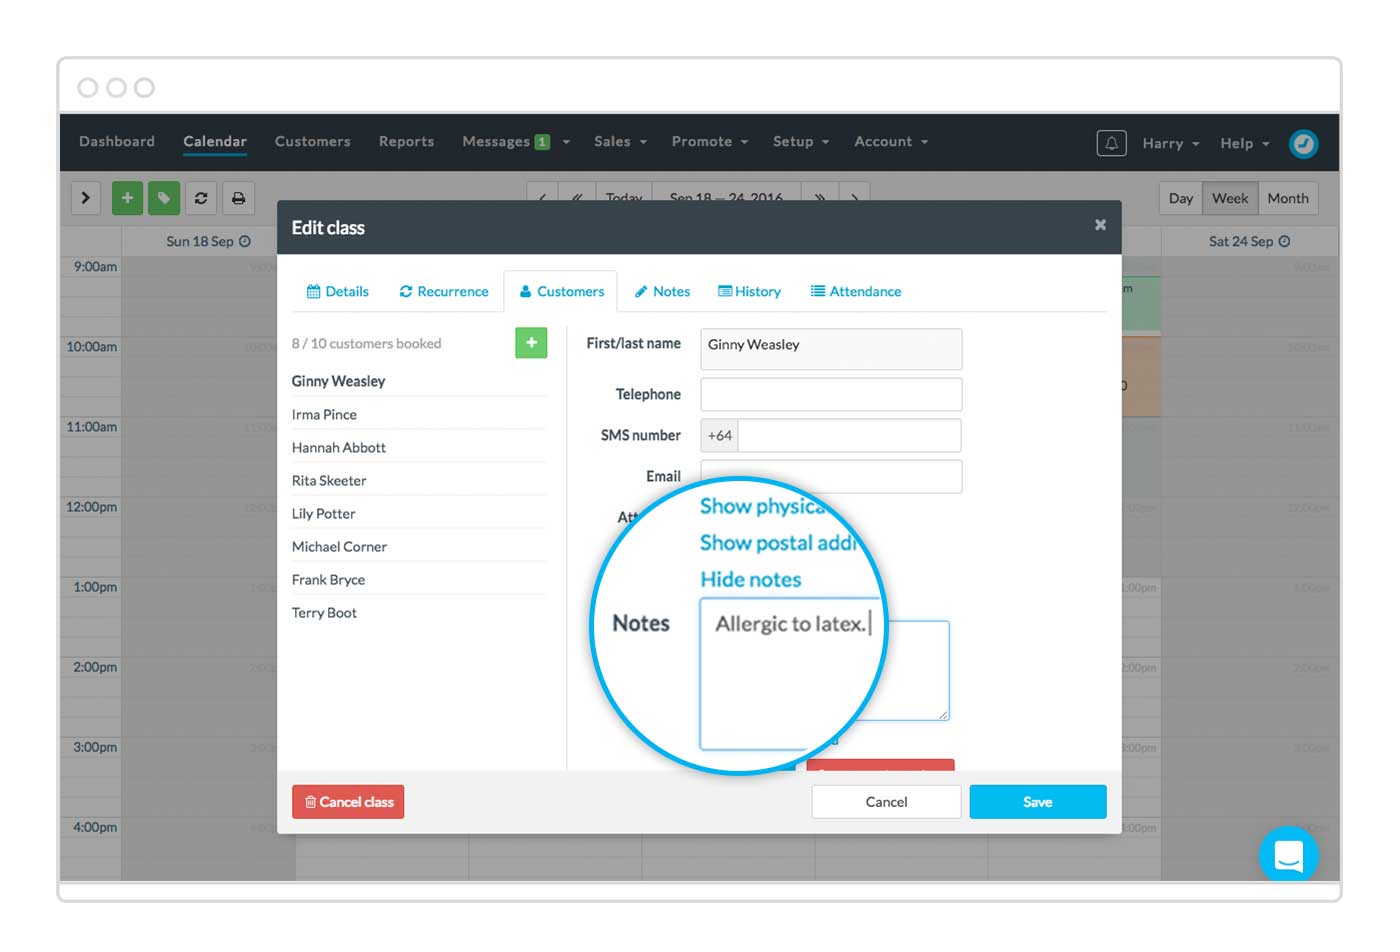
Add the alert or note to the field provided. When you’ve added all the notes you’d like to add, click Save on the class to update it. To add a note to the class, click on the class in the Calendar and pop over to the Notes tab: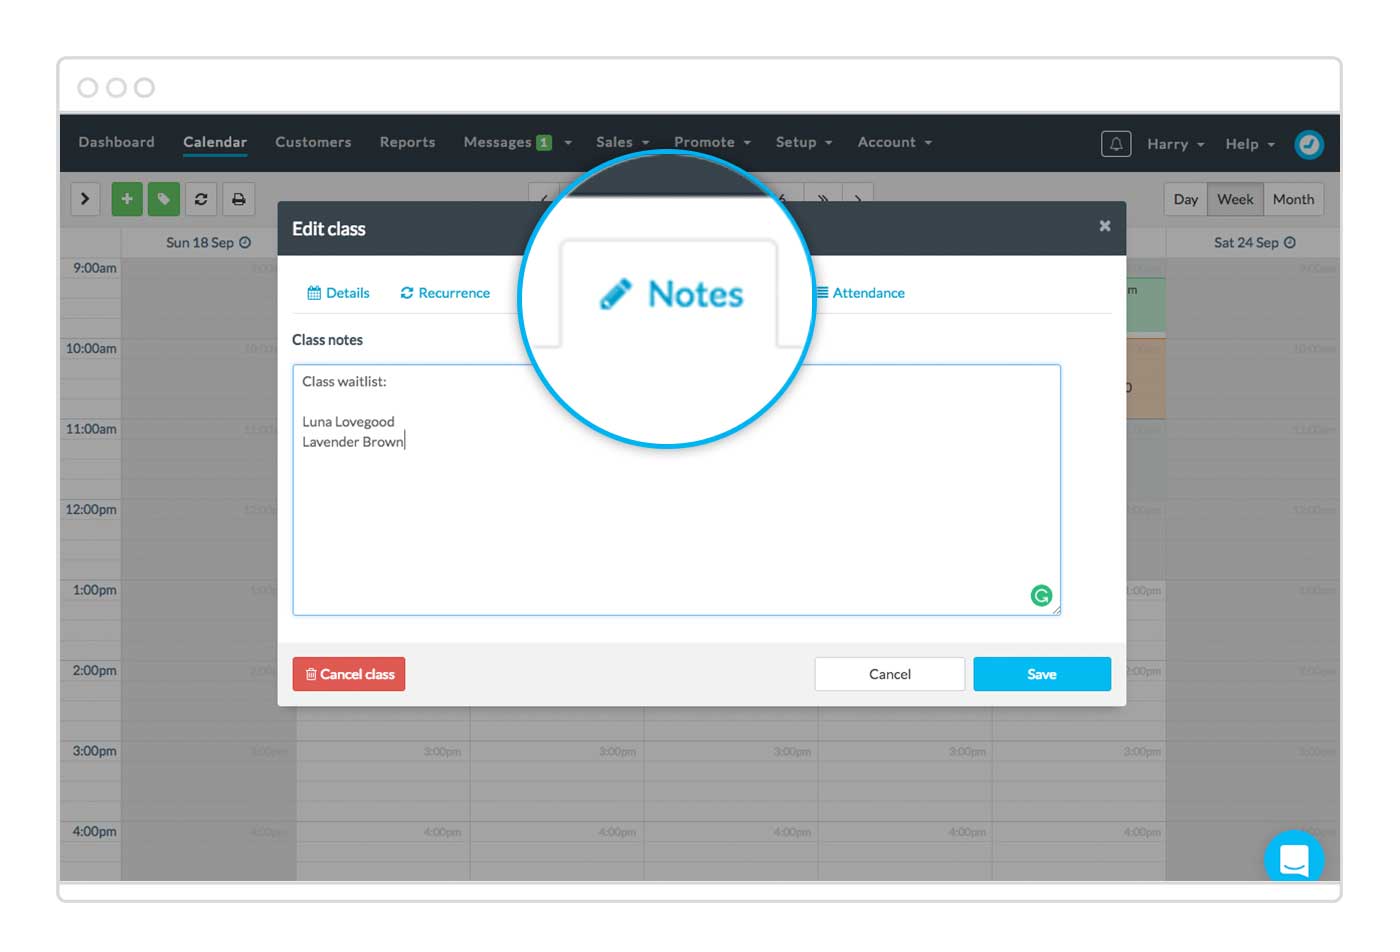
Enter the notes you’d like to record and click Save. This is a great place to keep a waitlist of any customers who would like to attend the class, should a space become available. The note icon will then show up on the class, as well as next to any customers that have a note recorded for them.
6. Jump ahead (or back) in the Calendar
Many businesses have a regular rebooking interval for their clients, whether it’s six weeks for a haircut or six months for your dental hygiene visit. Using our Jump feature in the Calendar, you can easily jump forward, or back in time at the interval that suits you. Click the [<<] or [>>] button next to the date selection and select the interval you’d like to jump forward/back by: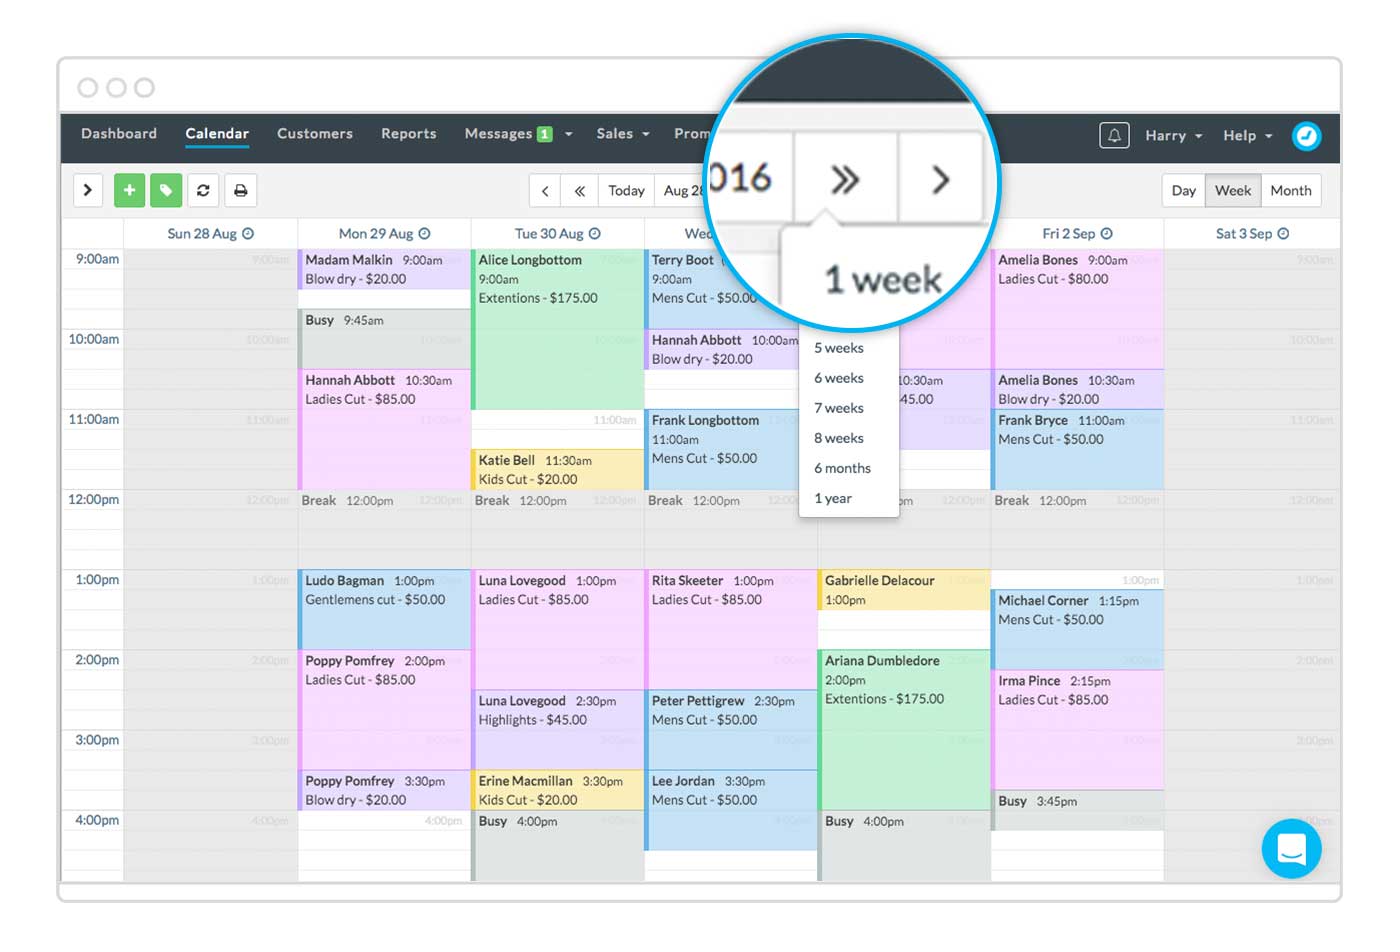
We’ll automatically load the calendar exactly that amount of time in the future or past. No math or time travelling skills required.
Thanks for joining us! I hope these tricks are helpful. Happy Timely-ing!


